
No drills, no dodgy tape, no headaches. Just a quick, painless setup that’ll have your Flexi Plates mounted in minutes.
Whether you’re rocking the Bracket Buddy™ Edge or Corner, we’ve got you covered. Follow along with our step-by-step guide or watch the video below—because, let’s be real, nobody reads manuals anyway.
Install in 3 easy steps
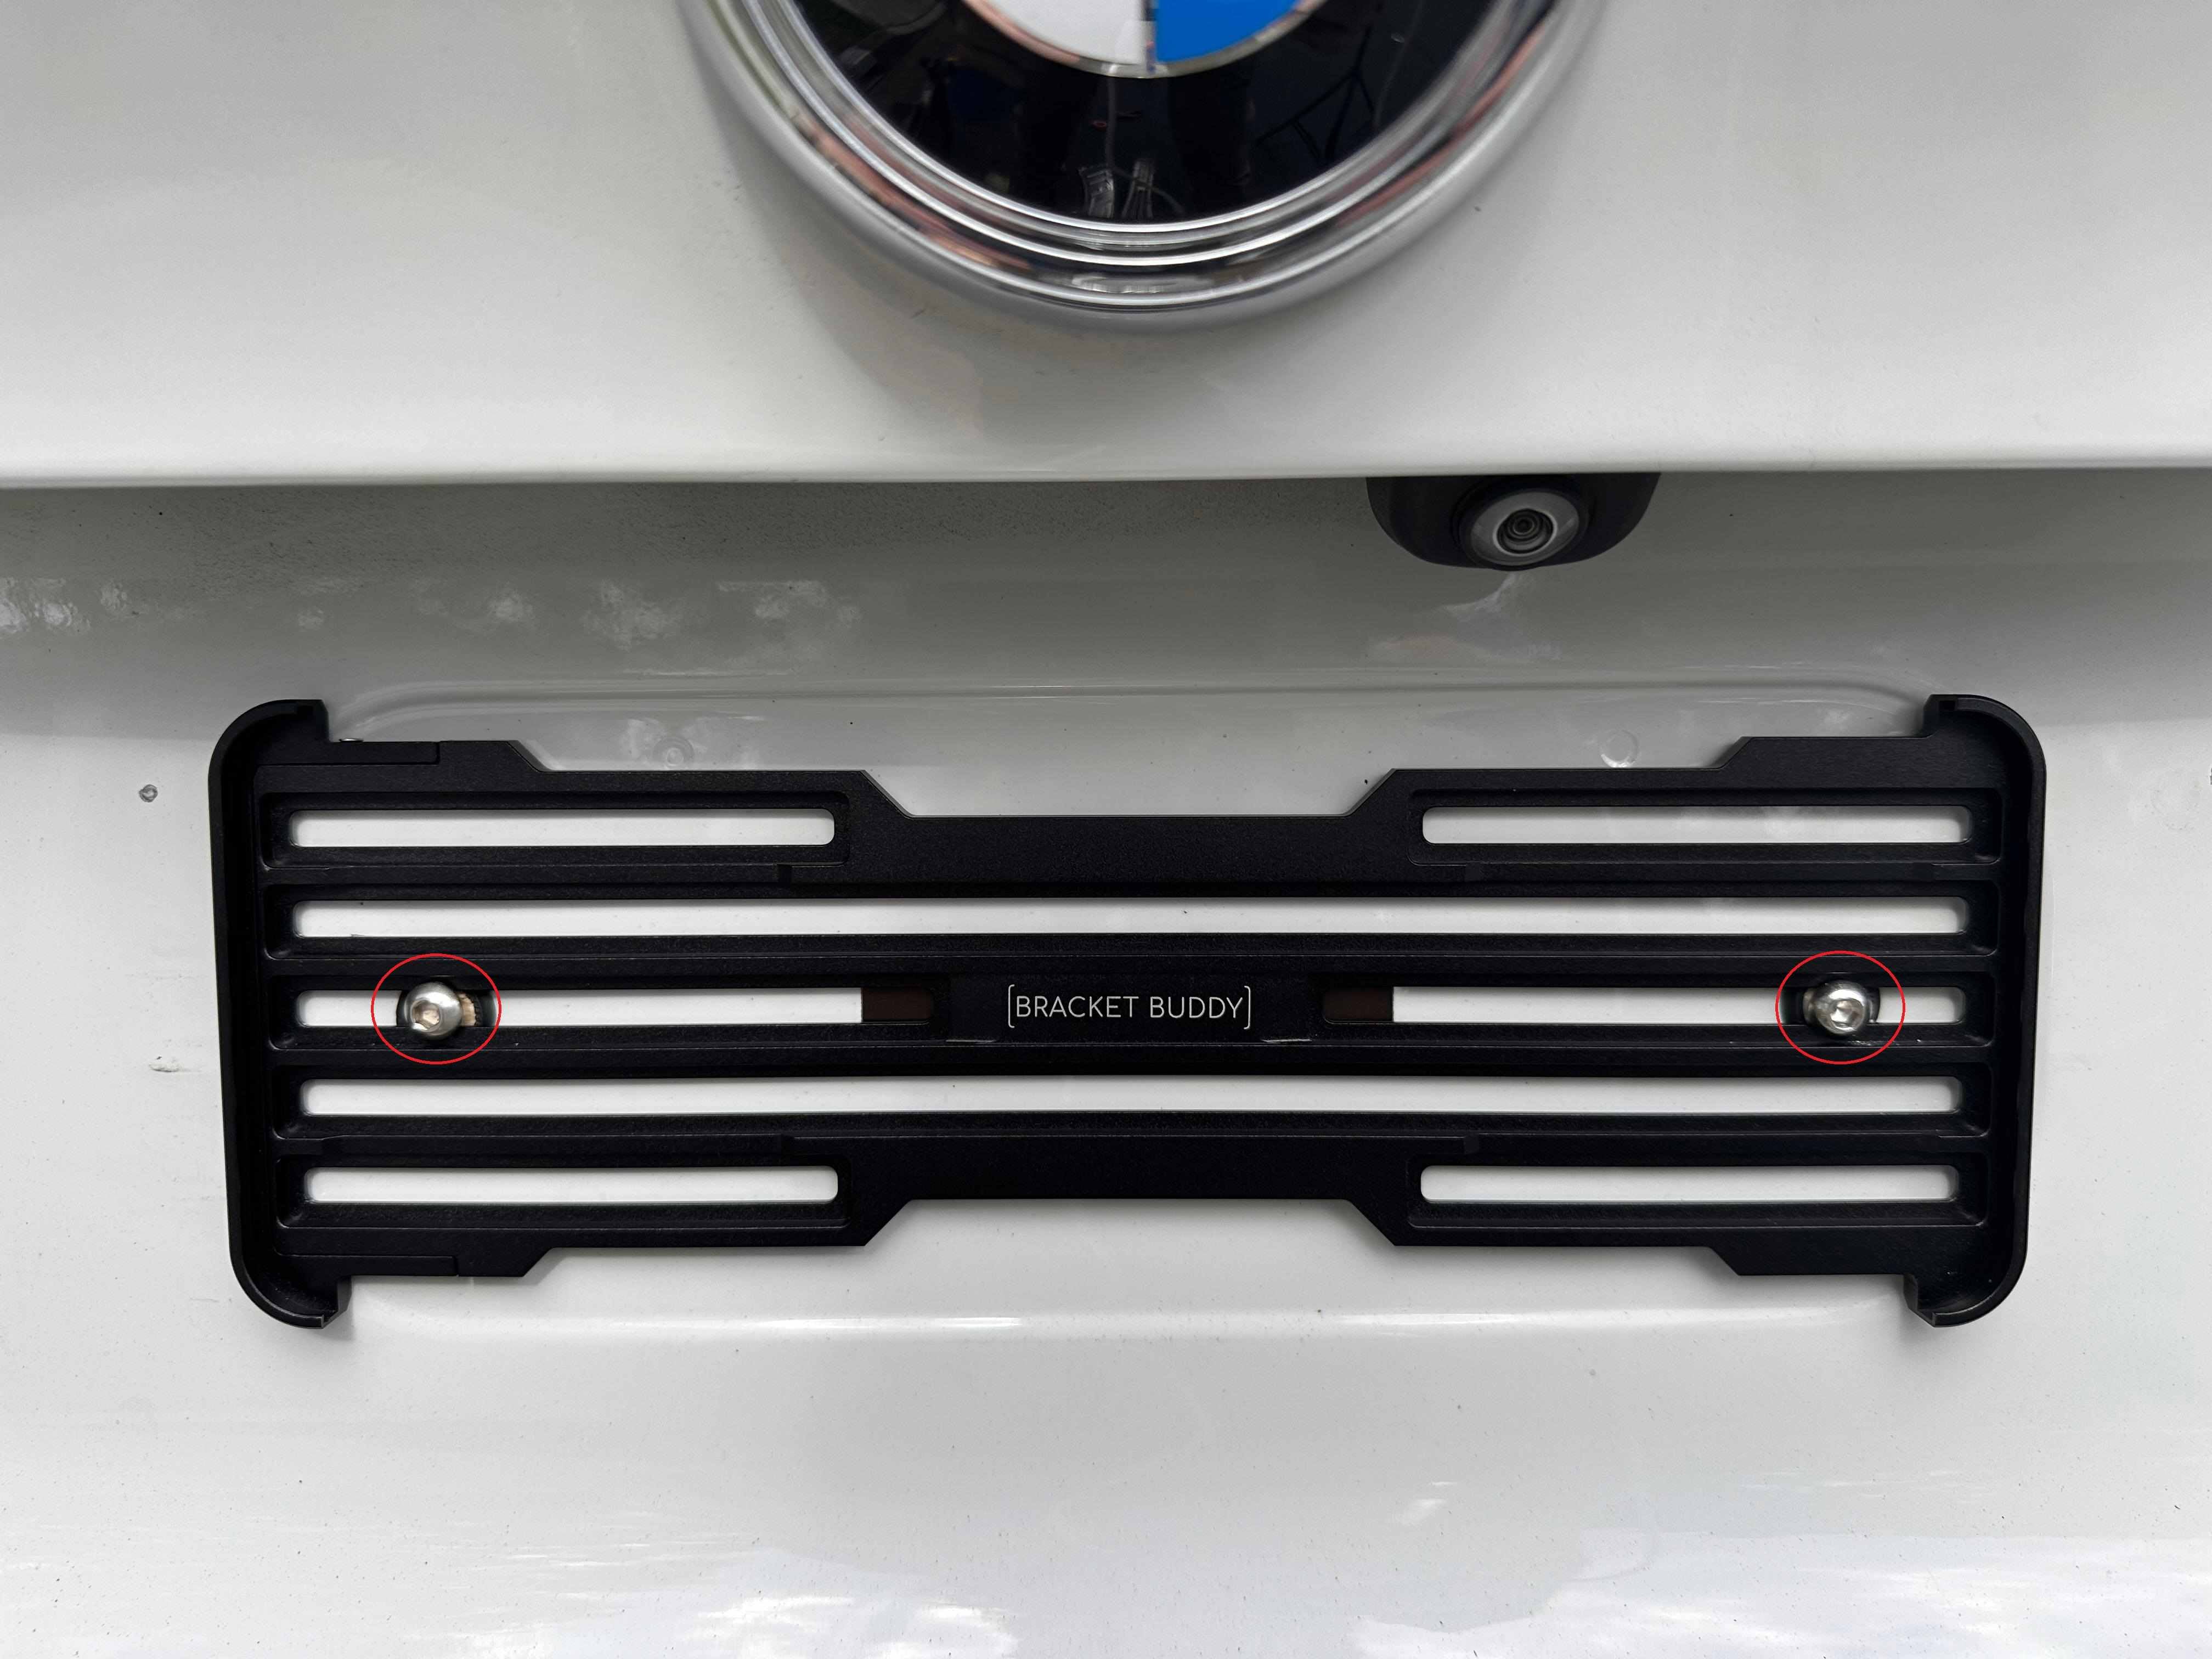
Step 1
Attach your Bracket Buddy™ Flexi Plate Bracket using the included M6 screws and bolts (we even highlighted them in red so you don’t mix them up). If they don’t fit your car, no stress—you can use your existing hardware instead.
Important: If you go rogue with your own screws, make sure they sit flush in the grooves, because a sleek, secure fit is kinda the whole point.
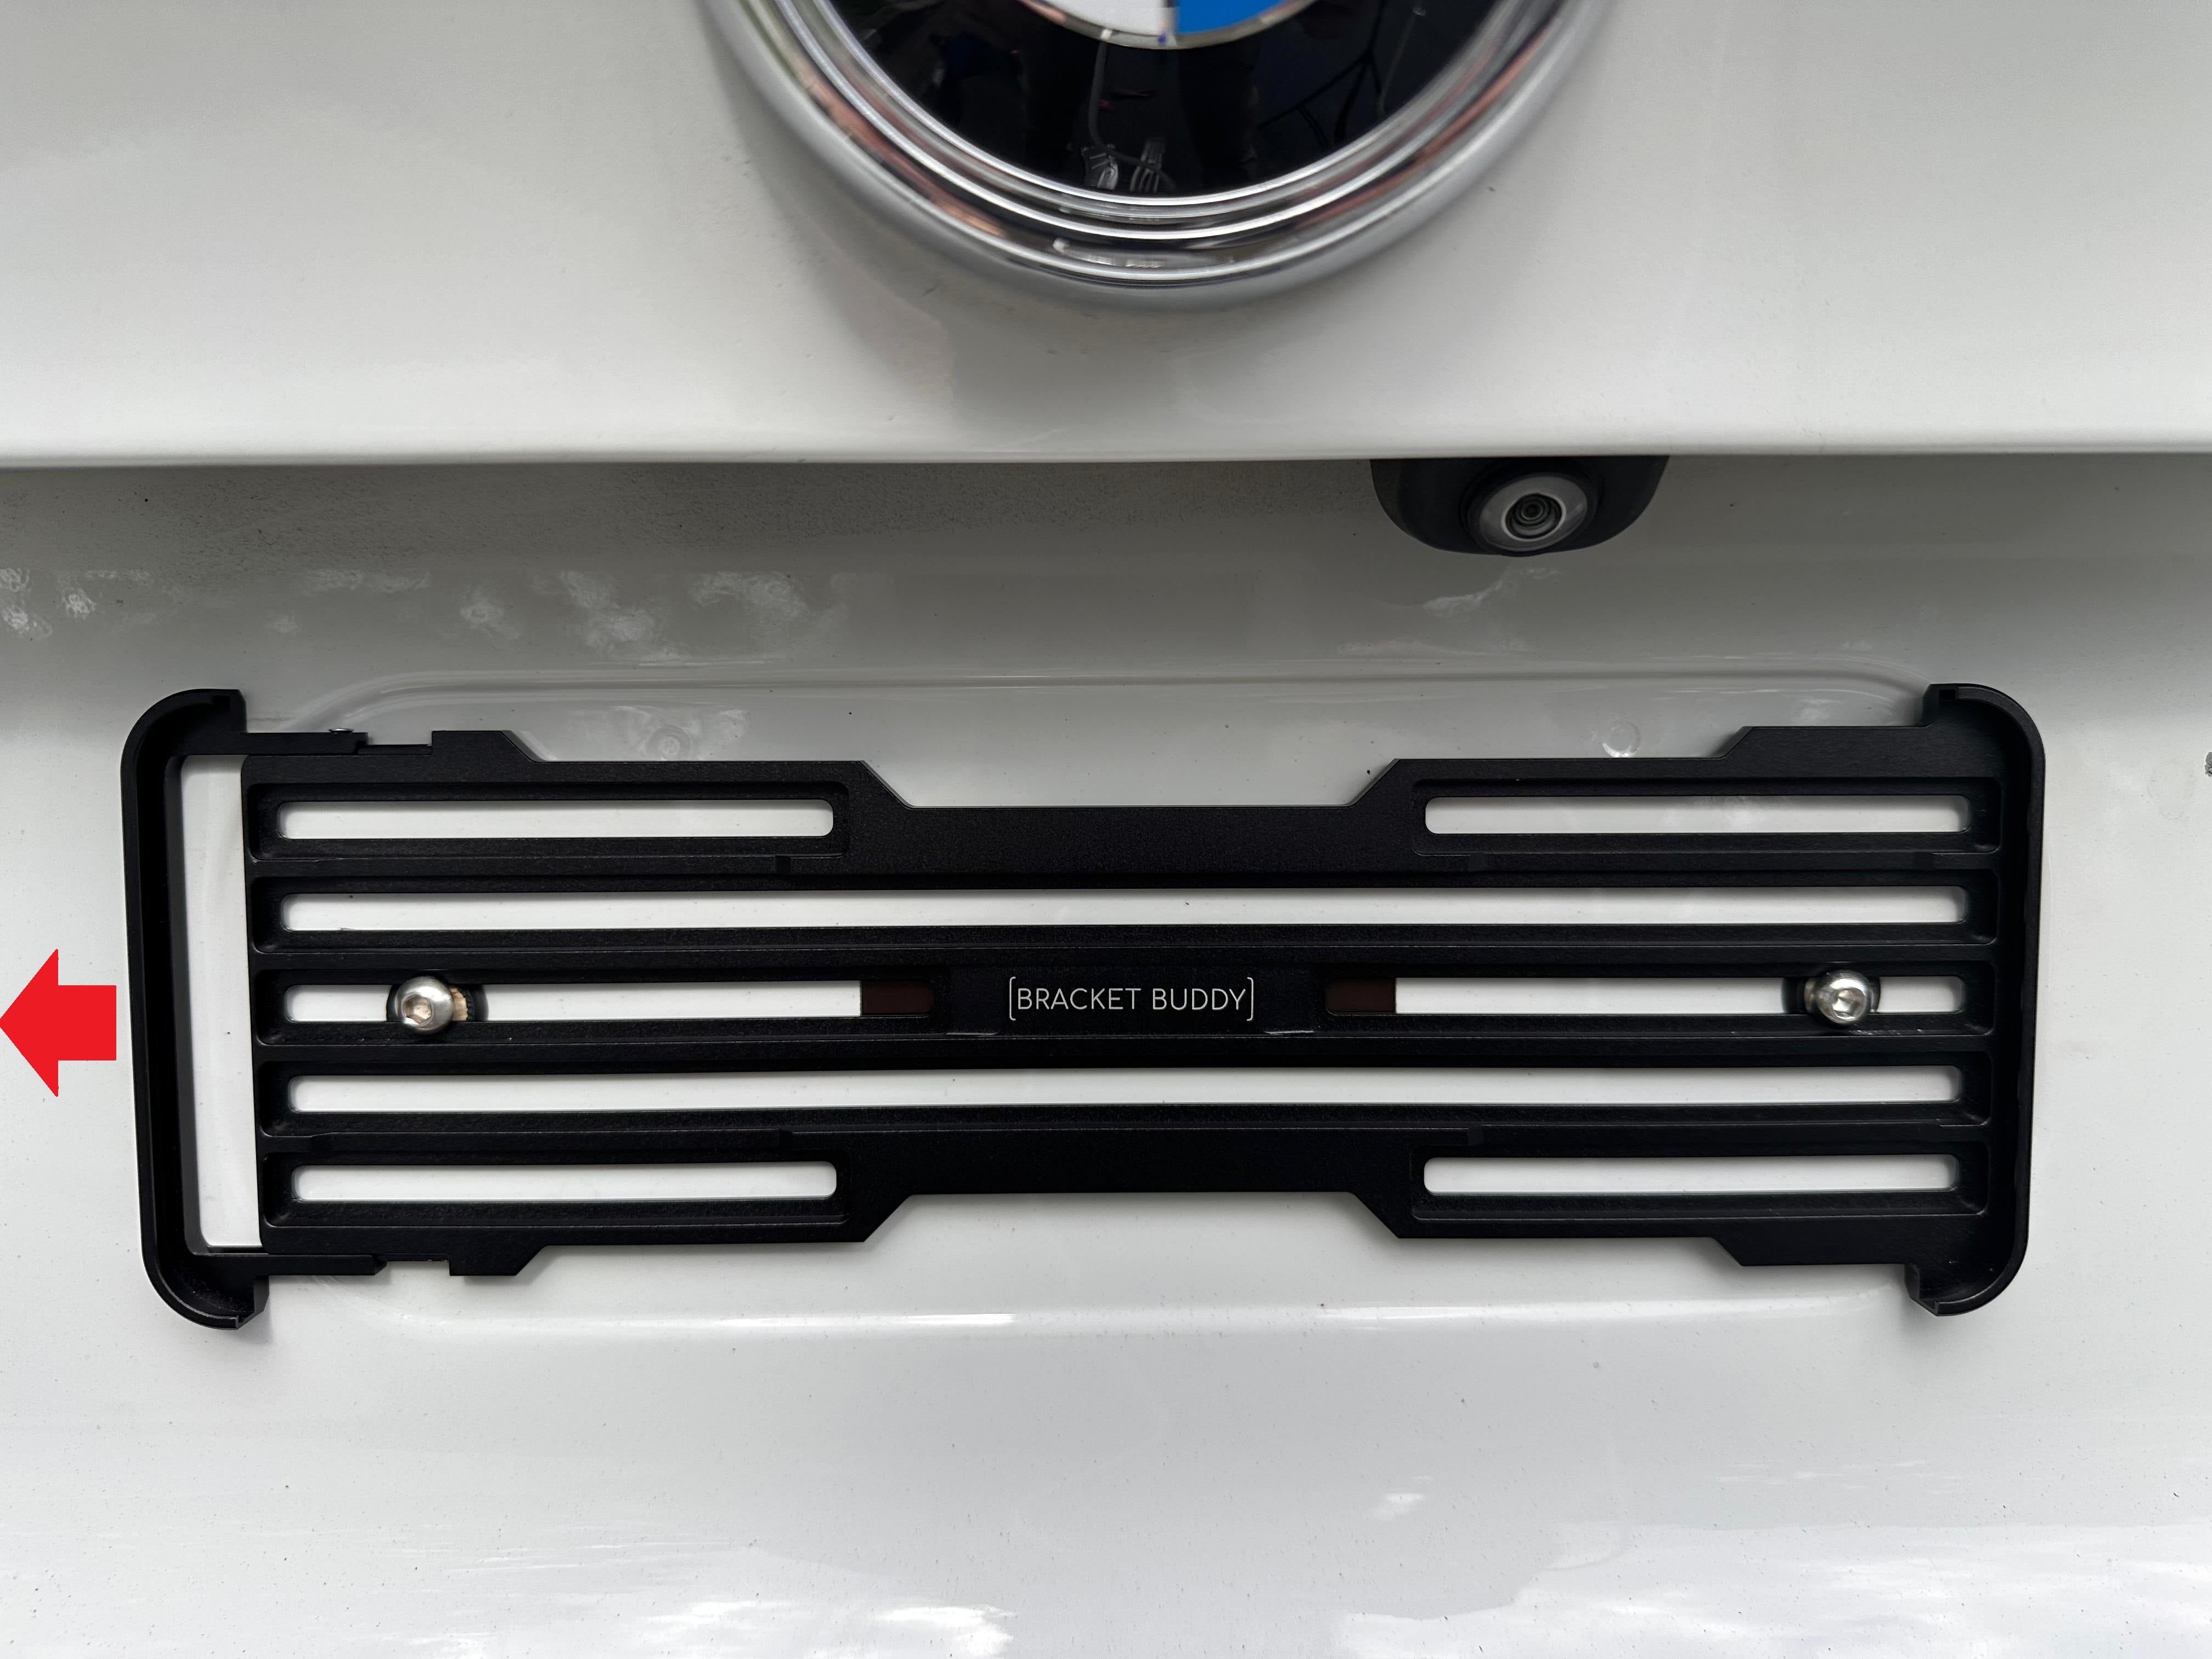
Step 2
Gently slide the smaller bracket component away from the larger one to create space. Insert your Flexi Plate into the bracket, ensuring it fits securely within the frame for a snug, professional fit.
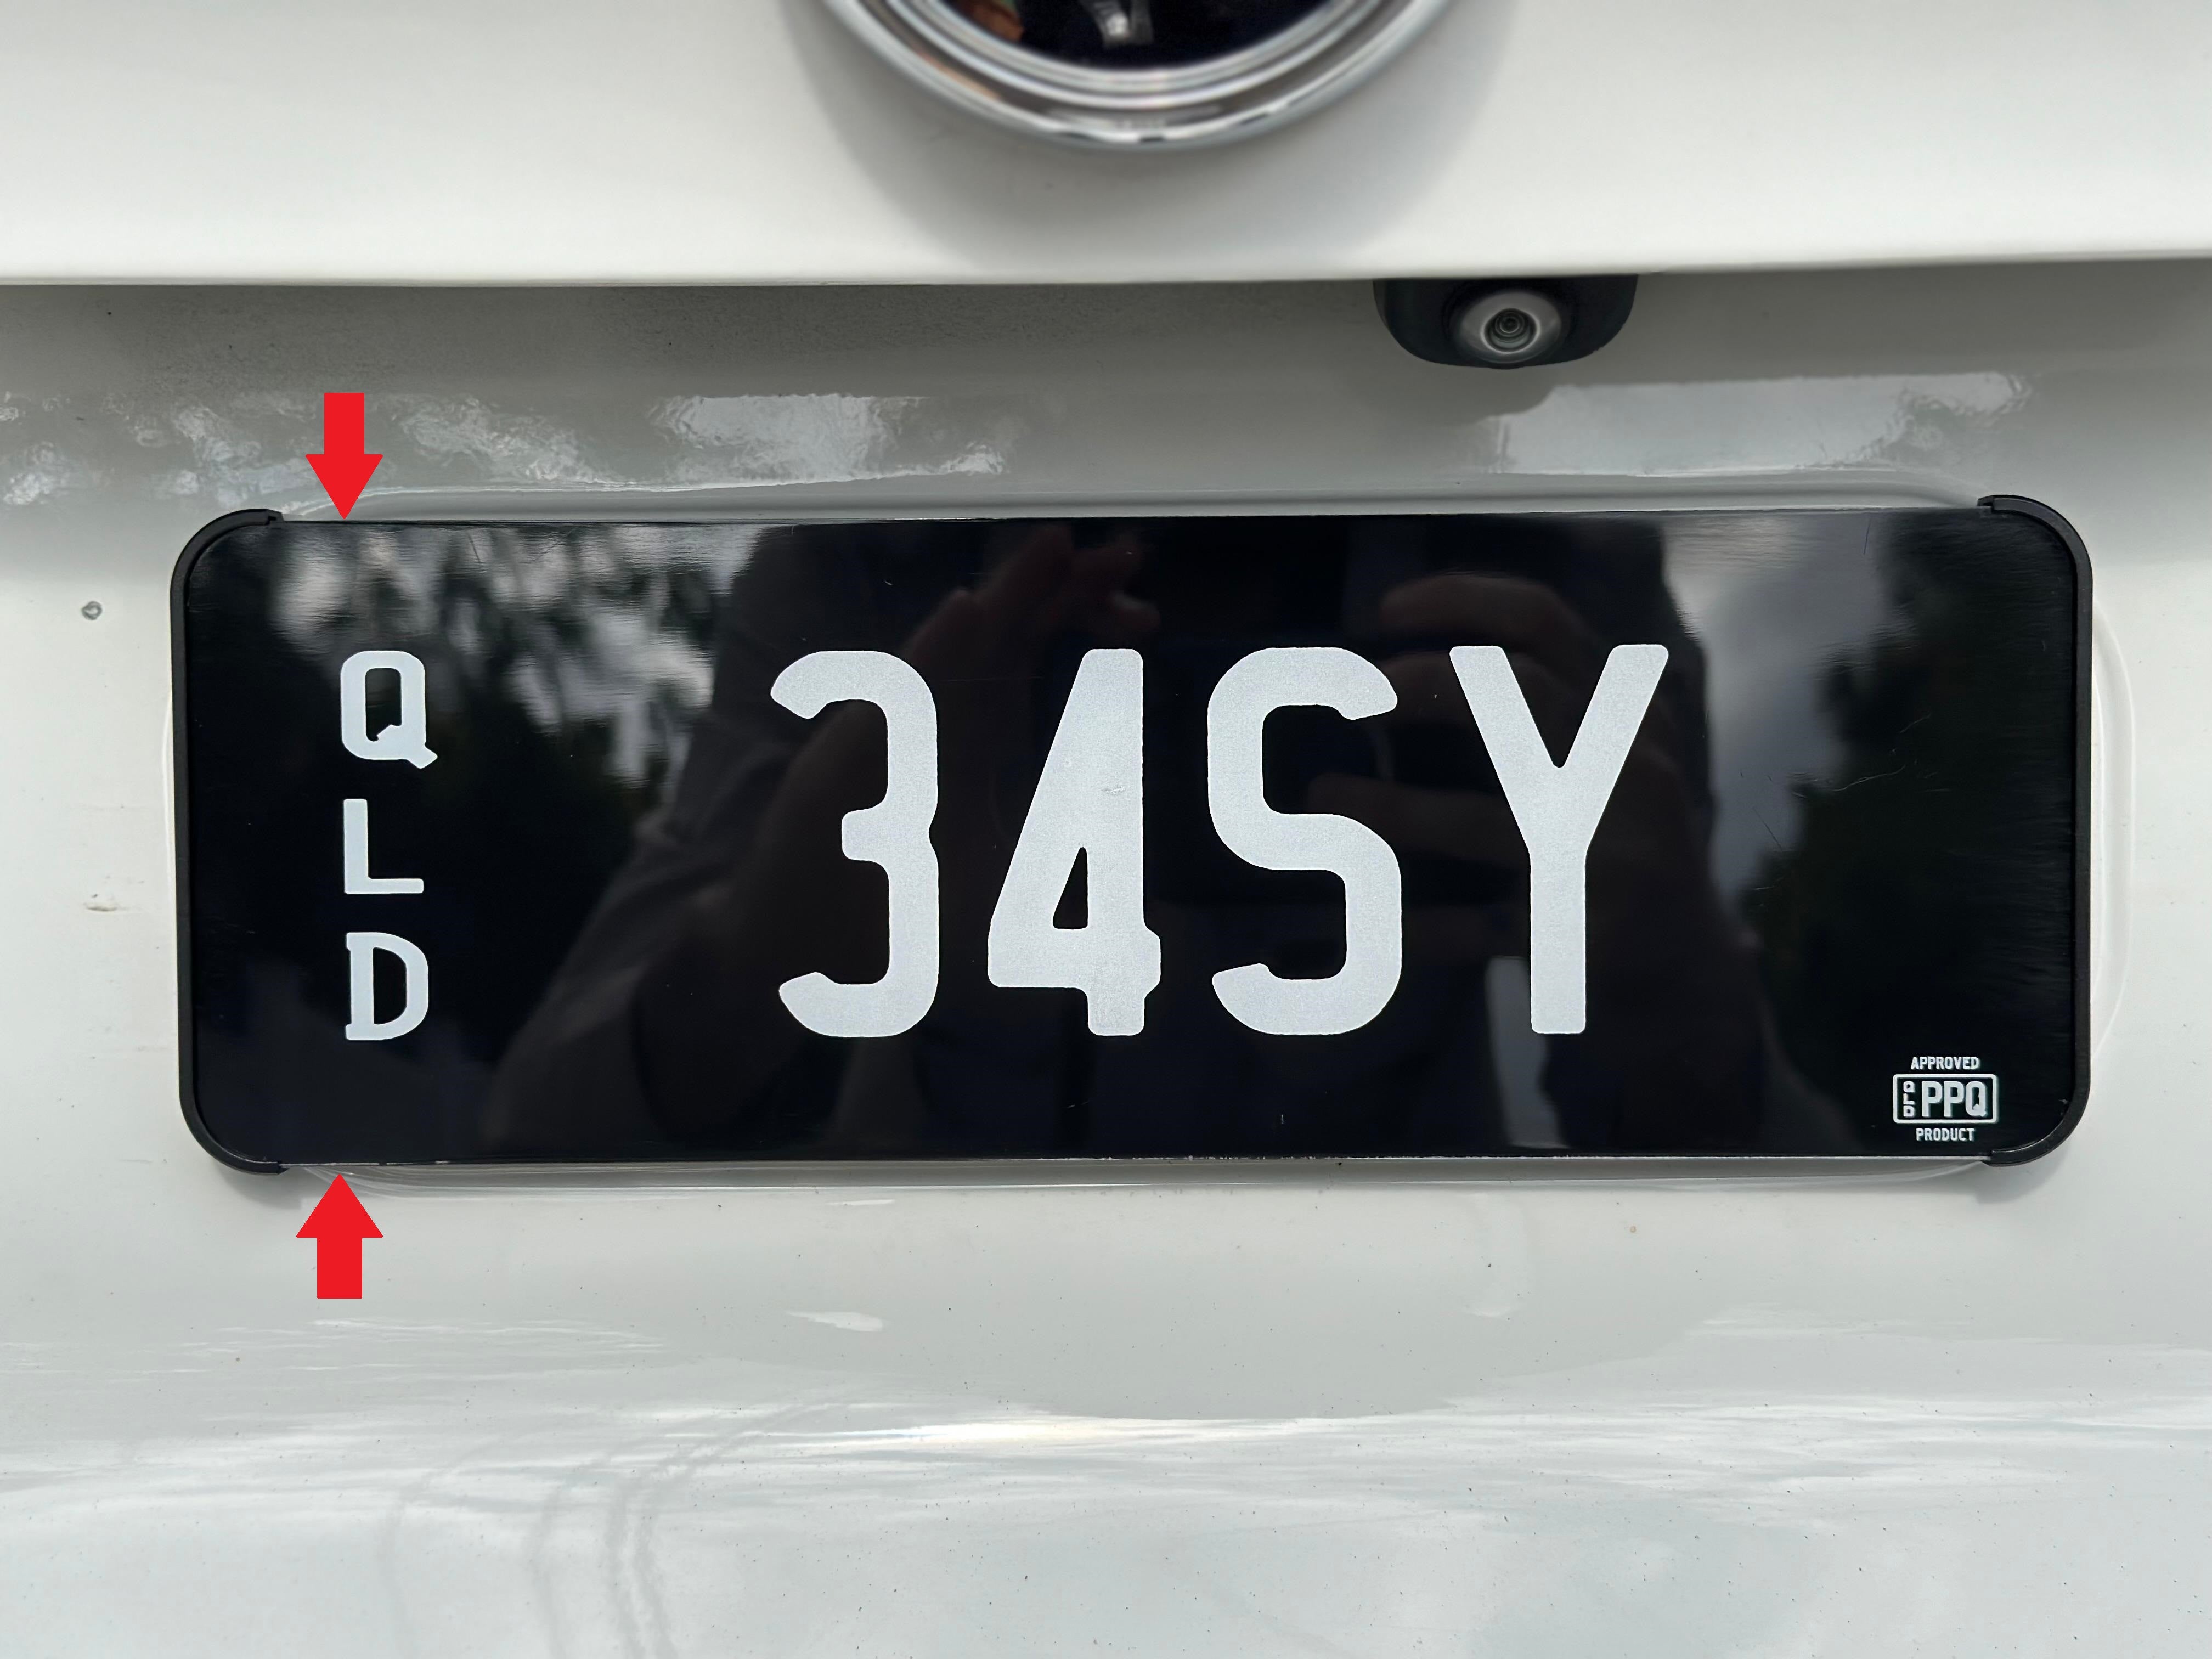
Step 3
Slide the smaller component back into position and tighten the M2 screws (highlighted in red) to lock it securely in place. These screws are discreetly hidden behind the plate, preserving the sleek, minimalist look.
And just like that, you’re done. No tape, no drilling, just a seamless fit for your Flexi Plates. Now take a step back and soak it in.
Bracket Buddy
Watch the Installation in Action
Note: The brackets are supplied with adhesive putty in each corner to ensure proper fit within PPQ manufacturing tolerances and to prevent vibration. After the initial test fit, you may need to adjust by removing some of the putty.
Take care not to over-tighten the screws.
If you encounter any issues during installation, please feel free to reach out to us at info@theflexiplateshop.com.au
The Flexi Plate SHop
Find Your Style


